How do you make sure that your client will be happy with the results you deliver on your shoots? And, how do you make sure that you can do a job you’ll be proud of that can help you grow your business? Here are some tips on how you can get into real estate photography, and have successful shoots right from the start.
Get the Right Equipment and Tools
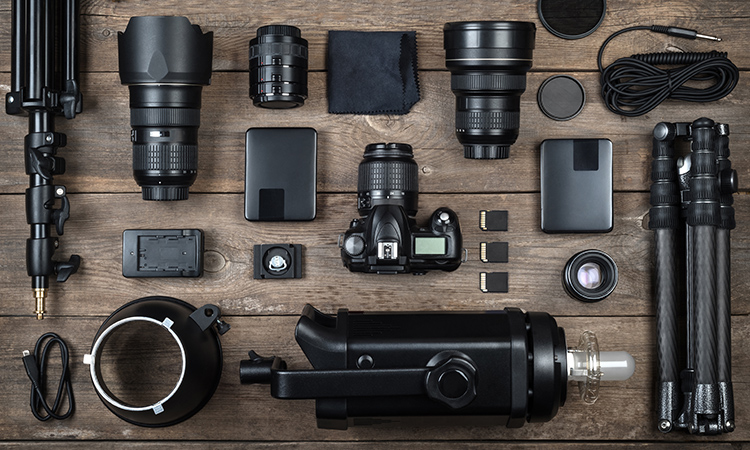
Starting out with the right equipment and tools is critical to getting photoshoots that you’re happy with. The basic equipment that you need include:
- Tripod: Real estate photography is slow. For stability, you’ll need a tripod.
- Full-frame camera and wide-angle lens: Most real estate photography requires getting whole rooms in the shot.
- Light: You may need a large source of light, like a stand. Also, consider an umbrella to bounce natural light.
- Accessories: Don’t forget critical items like timers, remotes, memory cards and batteries.
Preparing Yourself for the Shoot
The homeowner will do the work of cleaning up the home and getting it photo-ready. But what should you do to ensure you’re prepared? Here’s a checklist for you:
- Collect all equipment, including lenses, memory cards, batteries.
- Clean lenses.
- Ensure batteries are full.
- Plan shoot timing carefully for to get full or partial sun behind the home.
- Confirm details with the real estate agent.
- Confirm shot types and locations with the agent.
How to Complete a Real Estate Photoshoot
Before you start your photoshoot, do a quick walk through the property and point out potential areas of trouble so the homeowner can fix them. Usually, this is about moving clutter or major furniture. Then open blinds, shutters, and consider your options for lighting.
You may need to take three kinds of shots: wide angles, medium shots and detail shots. Here’s a guide on how to complete each.

Taking Wide Angle Shots
This is the most common photo needed in real estate. If you’re shooting a home, you’ll need a wide-angle shot of every room as well as the façade of the home and the backyard. You will get better at picking angles for these, but, at first, start by backing up as much as you can in the room and shooting it straight. If you end up in a corner, getting too close to the wall will distort the image.
There are a few basic things you’re looking for when you’re taking wide-angle shots. First, you need to balance the floor and the ceiling to not have too much of either. You want to also minimize distortion as much as possible, to make things look straight. If you need to move furniture to accomplish either visual balance or a straight look, you should.
Also, it’s ideal to achieve good light and a good balance of light. If your shots look too warm or cold, balance it and try to get to 5000k, the most neutral lighting.
When you’re taking wide-angles, aim for F9-F11. It’s a little slow, but it helps you make the most of the light. And, of course, go for the lowest ISO possible.
Taking Medium Shots
You may want to take medium shots of areas in the home that the real estate agent wants to highlight or that aren’t captured very well by the wide-angle shots. This might include office nooks, fireplaces, and other key amenities. For medium shots, you should use between a 28 and 35mm lens and an F5.6 to F8 aperture. With the smaller focus, you don’t need to maximize light in the same way you do for wide angles.

Taking Detail Shots
Detail shots are rare in most real estate photography, but it is still good to be prepared for them. You’re more likely to run into a request for detail shots if you’re working on a commercial building like a hotel or if you’re working on higher-end listings. You might be picking out details, like the woodwork on a banister in a craftsman’s home. We suggest you use 35 to 50mm focal length for detail shots.
Smart Ways for Beginners to Adjust to Conditions
You don’t need to master advanced techniques to start with real estate photography. At first, you can put the camera on AV-A or priority aperture mode, and the camera will adjust for the lighting conditions for you. Try not to go over ISO 800 to avoid noise on your shots.
One thing you will have to do is deal with windows. When you’re facing them and light is coming through them, you’ll need to adjust the shot. Most do this with exposure bracketing. This is a technique where you take three pictures, one over-exposed, one underexposed and one in the middle. You can then adjust the photos in post-processing to get something that is just right.

Post-Processing Options
You’ll likely want to invest in some software for post-processing to get your photos looking the best that they can. Common post-processing steps include:
- Bring up brightness.
- Find and correct lens distortions.
- Use white balance sliders.
Don’t forget that you’re not just creating ideal photos; you’re also starting to develop your own style as a real estate photographer. Don’t be afraid to offer some more experimental images (as long as they are consistent and show off the house well), and let your client choose if they like your style or want some adjustments made.
Focus on More Than Just Tech
As a real estate photographer, you’re not just offering photos. You’re interacting with your customer and offering them a customer experience. So being on time, thorough, prepared, and ready to meet your client’s expectations are all just as important as getting them the best photos.
Do you feel like you need more information to get started? Find more information about how to become a better real estate photographer on our blog.
For more information regarding iGUIDE click here.
If you have any questions and would like to speak to one of our Representatives then click here.
If you want to read more content like this then check out our Blogs and YouTube Channel.
Download our free eBook:
7 Extra revenue streams with iGUIDE


