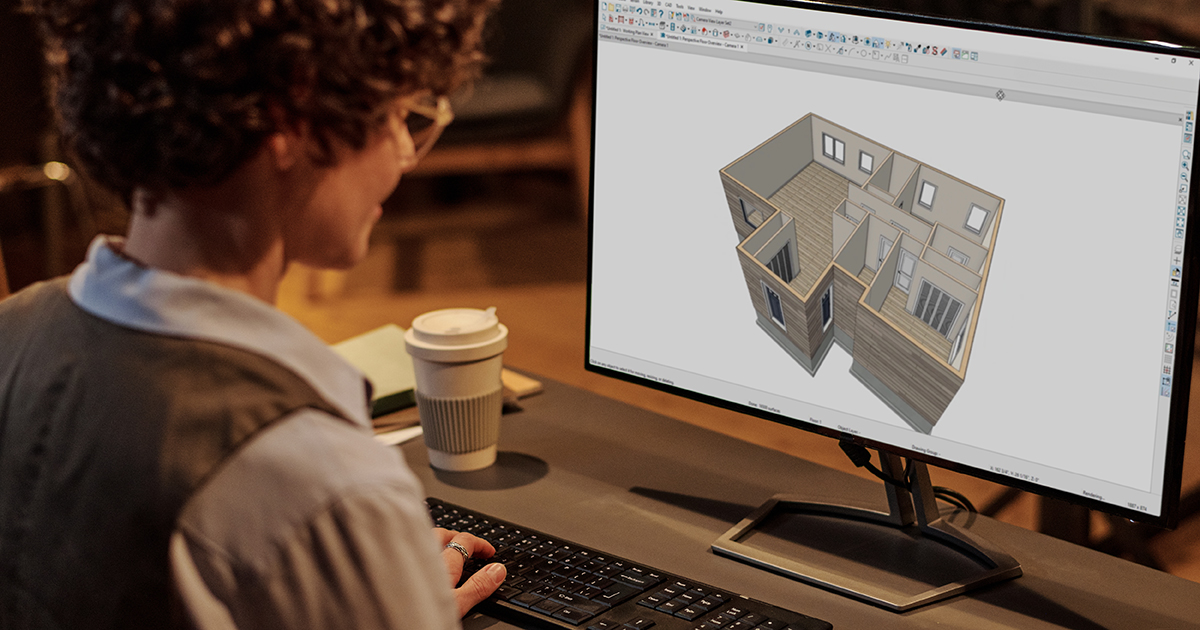
Unlock a world of possibilities by importing iGUIDE DWG files into Chief Architect. Together these tools allow you to overlay existing floor plans, scale drawings accurately, and visualize your designs in a 3D space.
Easily enhance your design workflow and bring your vision to life with the iGUIDE DWG Add-on.
Let’s explore the steps and strategies needed to import iGUIDE DWG files smoothly into Chief Architect. You’ll revolutionize the way you approach project visualization and design implementation. We’ll unravel the secrets to enhancing your workflow and achieving remarkable results in our construction and remodeling endeavors.
Understanding the significance of iGUIDE DWG Files
In the fast-paced world of construction and remodeling, precision and efficiency are paramount. iGUIDE DWG files play a crucial role in enhancing these aspects by providing detailed and accurate measurements for design processes. These files act as a foundation for creating architectural plans and layouts, ensuring that every inch is accounted for, and every detail is meticulously crafted to perfection.
Benefits of using iGUIDE DWG Files
When it comes to leveraging iGUIDE DWG files, the benefits are numerous and impactful for construction and remodeling professionals:
- Accurate Measurements: iGUIDE DWG files offer precise measurements that are essential for creating accurate floor plans and blueprints. These measurements help avoid errors during construction and ensure that every aspect of the design fits seamlessly together.
- Compatibility across platforms: One of the key advantages of iGUIDE DWG files is their compatibility with various design software and platforms including Chief Architect. This compatibility allows for seamless integration, enhancing your workflow efficiency and collaboration among team members.
- Efficient collaboration: By utilizing iGUIDE DWG files, construction and remodeling teams can collaborate effectively, regardless of location. The accompanying virtual walkthrough files are integral for sharing design details, facilitating communication, and reducing misunderstandings during the project development stages.
Importing iGUIDE DWG Files into Chief Architect
When working on projects that involve importing iGUIDE DWG files into Chief Architect, proper preparation of the files is essential for a seamless process. By following the necessary steps and understanding the import process within Chief Architect, you can ensure accurate results for your project.
Preparing the iGUIDE DWG file for import
Before importing the iGUIDE DWG file into Chief Architect, it is crucial to ensure that it is optimized for compatibility and accuracy.
Review the file and confirm that it contains all the required design elements. Check for any errors or inconsistencies that may affect the import process.
Additionally, consider the scale of the drawing and make any necessary adjustments to ensure proper alignment within Chief Architect.
Step-by-step process to import an iGUIDE DWG file into Chief Architect.
1. Start by locating the iGUIDE DWG file on your computer.
2. Launch Chief Architect and start a New Plan.
3. Select File> Import> Import Drawing (DWG, DXF) from the menu.
4. In the Import Drawing Assistant dialog that displays, click Next or >Continue to go to the Select Fileportion of the dialog:

5. On the Select Layers portion of the dialog:

6. Under Layer Mapping:
All lines you want to convert to walls must be on one layer. The same is true for windows, doors, and rails. Placing like items on a single layer with unique attributes is helpful.

7. Under Drawing Unit:
Selecting the correct unit helps ensure that your imported drawing is accurately sized.

8. Click Finish or Done to bring the DWG or DXF drawing in to your floor plan.
Making adjustments: After your 2D CAD drawing has been imported into Chief Architect, you may want to adjust their locations. First, delete any wall lines or polylines located between the interior and exterior wall surface lines. Then use the CAD to walls tool to make adjustments.
Troubleshooting: Common issues such as scale discrepancies, layer conflicts, or missing elements can be addressed by adjusting the import settings and ensuring that your imported files align with your project requirements.
By mastering the art of optimizing iGUIDE DWG files within Chief Architect, you can save time by streamlining your processes and delivering exceptional results in your construction and remodeling projects.
For more resources on optimizing your DWG files, watch our Let’s get started series: AEC.
1DWG Floor Plan delivery time is dependent on property size and complexity and may exceed 48 hours. Excluding Sundays, holidays, and outside office hours (Mon-Fri, 9am – 5pm EST).